

Most healthy adults can skip a dental clinic for routine whitening — provided they follow three non-negotiable prep steps: schedule a basic dental check and cleaning, use a potassium-nitrate desensitizing toothpaste for one to two weeks before starting, and remove surface plaque so whitening agents can reach enamel evenly. These skip dental clinic whitening tips aren’t shortcuts — they’re what separates safe, visible results from patchy, painful ones.
A few situations do require a dentist first. Untreated cavities, active gum disease, or large crowns and veneers on front teeth mean at-home whitening isn’t the right starting point. The same goes for pregnancy or children under the recommended age. For everyone else, a well-chosen at-home kit with the right prep can deliver real results.
The ADA recommends consulting a dentist before any bleaching and using products that have the ADA Seal of Acceptance. The FDA limits over-the-counter peroxide concentrations for consumer safety. Getsmilefam’s BLU Whitening Technology offers an enamel-safe at-home option formulated without harsh chemicals, designed for sensitive gums.
- Get a dental check and cleaning before you start
- Switch to a potassium-nitrate toothpaste and use it twice daily for 1–2 weeks before starting whitening to reduce post-bleach sensitivity and prepare your enamel.
- Remove plaque and surface deposits for even gel contact
- Avoid at-home whitening if you have untreated decay or gum disease
Table of Contents
- How to prep your teeth before at-home whitening
- Which at-home whitening methods actually work?
- What DIY hacks actually damage your teeth?
- How to prevent and manage sensitivity during whitening
- What timeline should you realistically expect?
- When you actually need to see a dentist
- Why peroxide works and why most “natural” hacks don’t
- Your pre-whitening checklist
- Key Takeaways
- The case for skipping the clinic — with your eyes open
- Getsmilefam fits the skip-clinic approach
- Useful sources and further reading
How to prep your teeth before at-home whitening
Getting the prep right is what separates a smooth, even result from a blotchy, sensitive one. Follow this timeline in the two weeks before your first whitening session.
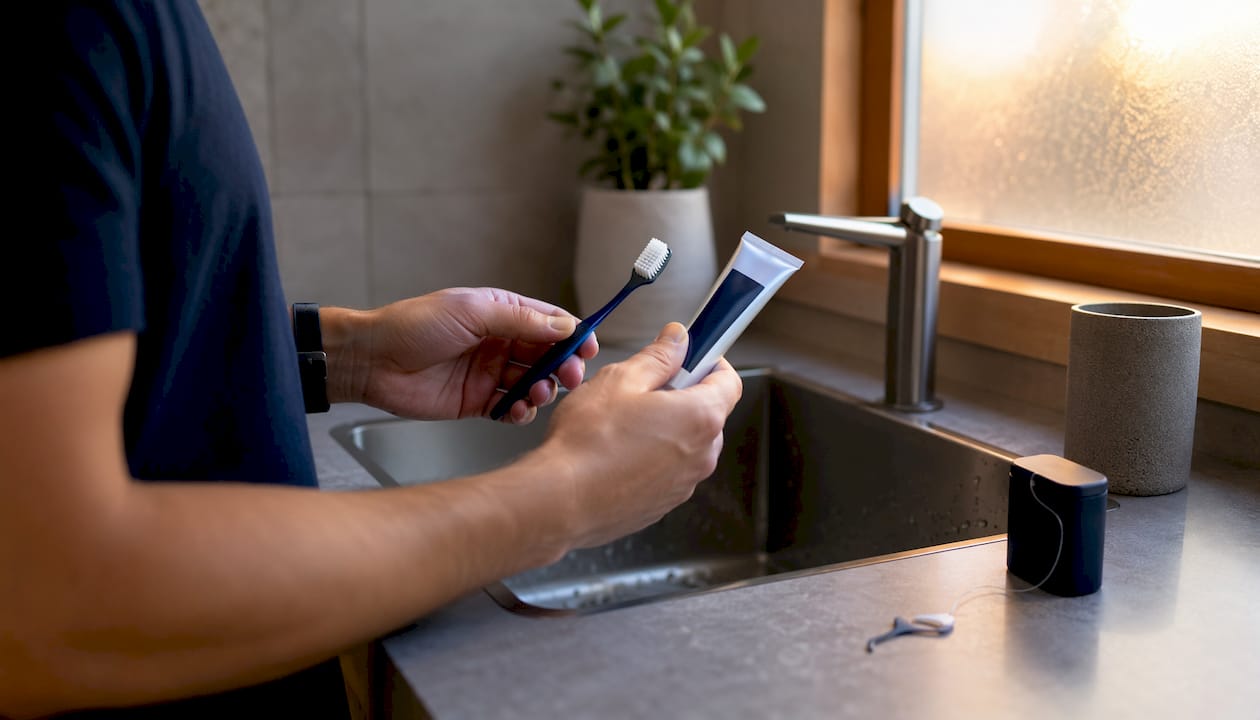
1. Schedule a dental check and cleaning (2 weeks out) A professional cleaning removes plaque and tartar that block whitening gel from reaching enamel uniformly. Surface deposits cause patchy results and can trap gel against gum tissue. While you’re there, ask the dentist to check for crowns or veneers on your front teeth — those restorations won’t change shade, and whitening the surrounding teeth can create a visible mismatch.
2. Switch to a desensitizing toothpaste (2 weeks out) Potassium-nitrate toothpaste pre-loads the dentinal tubules, reducing the nerve response that causes post-bleach sensitivity. Use it twice daily for 1–2 weeks before whitening to achieve protection.
3. Correct your daily oral hygiene (ongoing) Brush twice daily for two minutes, floss every night, and stay hydrated. Plaque is porous and absorbs staining compounds; clean enamel whitens faster and more evenly.
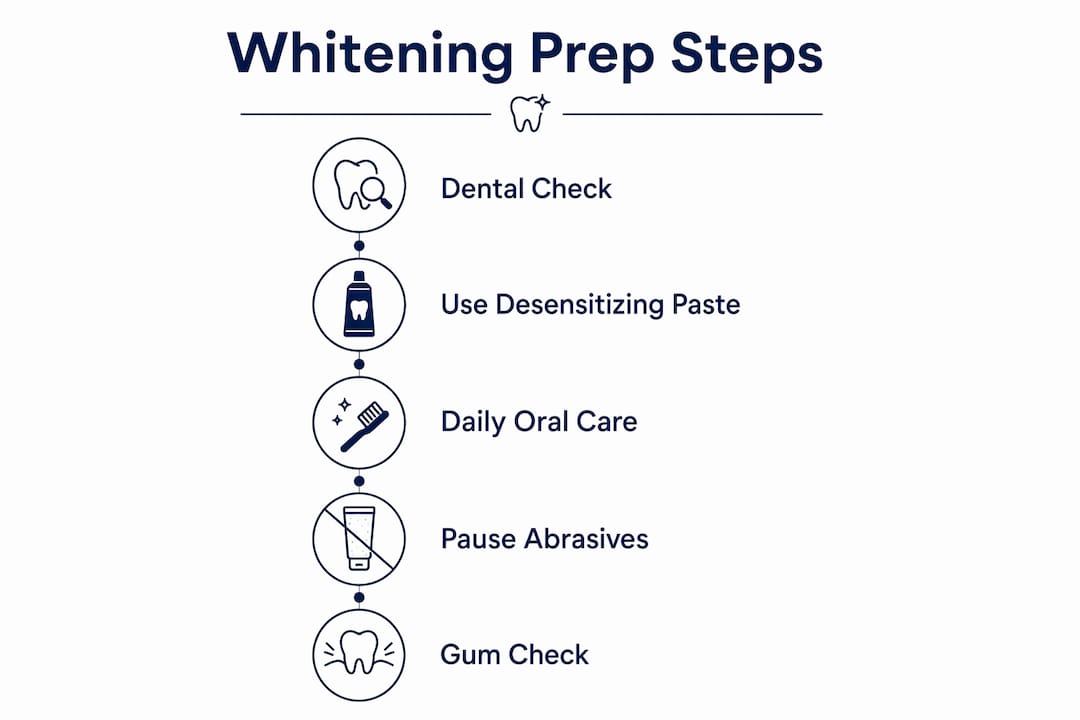
4. Pause abrasive or acidic products (1 week out) Stop using charcoal toothpaste, acidic mouthwashes, or any abrasive scrub. These micro-scratch enamel and open pathways for sensitivity during whitening.
5. Do a quick gum health check (day before) Healthy, pink, non-bleeding gums are the green light. Swollen, red, or bleeding gums are a stop sign — whiten after the issue is resolved, not through it.
Pro Tip: Ask your dentist specifically to note any crowns, veneers, or bonding on your front six teeth. Photograph your current shade against a white card so you have a real before-reference — phone cameras lie.
Which at-home whitening methods actually work?
Not all at-home options are equal. Here’s what the evidence supports, and how to use each one correctly.
OTC whitening strips (7–10% hydrogen peroxide) Strips are the most studied consumer option. Apply them to dry teeth for the time listed on the packaging — usually 30 minutes once daily. The most common mistake is applying them to wet teeth, which dilutes the gel. Expect a visible difference with consistent use over several days to weeks. Peroxide-based strips achieve measurable shade changes; non-peroxide “natural” agents mainly remove surface film and don’t oxidize stain molecules.
Custom trays with carbamide peroxide Dentist-prescribed trays use lower peroxide concentrations worn for longer periods — typically overnight. They cover teeth more evenly than strips and reduce gum contact. Results usually appear after consistent use over a period of weeks. The lower concentration means less sensitivity, which is worth the slower pace for anyone with reactive teeth.
Whitening toothpaste Best used for maintenance, not initial whitening. The ADA Seal of Acceptance confirms a product is tested safe and non-damaging to enamel. Use it daily after completing a whitening course to slow stain re-accumulation.
Whitening pens for spot touch-ups Pens deliver a thin layer of gel to specific teeth — useful for touch-ups between courses or for targeting one stubborn tooth. The Getsmilefam Snow Serum™ Whitening Pen is built for exactly this: quick, targeted application without the setup of a full tray session.
Getsmilefam BLU Whitening Technology Getsmilefam’s proprietary BLU Whitening Technology, developed in Singapore, uses enamel-safe formulas free from harsh chemicals. It’s designed for immediate visible results within a single session and suits people with sensitive gums who want to achieve salon-white results at home without clinic-strength peroxide.
LED kits If you own an LED kit, use the gel as directed and skip the light step when possible. Two major meta-analyses found no added shade benefit from light activation at concentrations used in retail kits, and the light can increase sensitivity risk. The gel does the work.
- Apply gel to dry teeth only — moisture dilutes the active ingredient
- Use a thin layer; overfilling a tray pushes gel onto gum tissue
- Wipe any overflow immediately with a cotton swab
- Apply petroleum jelly to the gum line as a barrier if you’re prone to irritation
Pro Tip: If you already own an LED kit, spend the money on extra gel cartridges rather than repeat light sessions. The oxidation happens in the gel, not the light.
What DIY hacks actually damage your teeth?
Some of the most-shared whitening tips online are the most harmful ones.
Lemon juice, undiluted acids, and concentrated charcoal abrasives don’t whiten teeth — they remove enamel. Enamel doesn’t grow back. Clinical experts warn that DIY whitening mixes and acidic substances cause long-term damage and pulp irritation that no whitening kit can reverse.
What to avoid:
- Lemon juice or citric acid pastes: The acid erodes enamel surface with every application. Any “brightening” is enamel thinning, which eventually makes teeth look more yellow as dentin shows through.
- Undiluted hydrogen peroxide rinses: Household peroxide is a different concentration than dental-grade product. Incorrect mixing risks chemical burns on soft tissue.
- Charcoal toothpaste used daily: Abrasive enough to scratch enamel over time. Occasional use is less risky, but it offers no bleaching — it only scrubs surface film.
- Baking soda daily: Short-term baking soda and peroxide paste can lift surface stains, but daily use increases abrasion risk and long-term yellowing as enamel thins.
Safer alternatives that actually help:
- Rinse with water immediately after coffee, tea, or red wine
- Use a straw for staining drinks to reduce tooth contact
- Chew crunchy raw vegetables (carrots, celery) to help dislodge surface film
- Choose an ADA-accepted whitening toothpaste for daily maintenance
- Stick to regulated peroxide products within FDA-accepted concentrations
Pro Tip: Choosing gentle formulations matters beyond teeth. The same principle that applies to avoiding harsh chemicals in skincare applies here: aggressive ingredients don’t equal better results.
How to prevent and manage sensitivity during whitening
Sensitivity is the most common reason people abandon an at-home whitening course. Most of it is preventable.
Start potassium-nitrate desensitizing toothpaste 1–2 weeks before your first session and continue using it throughout the course. This is the single most evidence-backed step for reducing post-bleach nerve response. If sensitivity still appears:
- Shorten contact time by 5–10 minutes per session
- Drop from daily to every other day
- Take a 1–2 day break and restart at a lower frequency
- Skip the LED light entirely if you’re already experiencing sensitivity
- Apply a fluoride gel after each session to help remineralize enamel
When to stop and see a dentist: sharp, persistent pain that doesn’t ease within 24 hours, gum swelling, or sensitivity that worsens after you’ve already paused treatment. These aren’t normal whitening side effects.
Excess gel on gum tissue is the most common user error and a leading cause of irritation. Apply a thin layer, check the tray fit before inserting, and wipe any overflow immediately.
Pro Tip: If gel overflows onto your gum line, wipe it off right away with a dry cotton swab and reapply a thinner layer. Don’t wait until the session ends.
What timeline should you realistically expect?
At-home whitening works — it just works on a different clock than in-office treatment. In-office sessions can achieve 5–8 shades in one chair appointment; most OTC methods require multiple days to weeks for visible improvement.
| Method | First visible results | Full results | Longevity |
|---|---|---|---|
| OTC whitening strips | several days | up to two weeks | a few months |
| Custom trays (carbamide peroxide) | about a week | several weeks | several months |
| Whitening toothpaste (maintenance) | a few weeks | Ongoing | Ongoing with use |
| Whitening pen (touch-up) | a few days | up to two weeks | a few months |
| In-office (for comparison) | 1 session | 1 session | several months |
Lifestyle is the biggest factor in how long results last. Coffee, red wine, tea, and smoking all accelerate stain re-accumulation. Whitening right before a heavy coffee week is a waste of a course.
Maintenance checklist:
- Touch up with strips or a pen every 2–3 months
- Use whitening toothpaste daily after completing a course
- Schedule a professional cleaning every six months
- Avoid deeply staining foods and drinks for 48 hours after each whitening session
- Stay consistent with enamel-safe daily whitening habits between courses
When you actually need to see a dentist
At-home whitening isn’t appropriate for every situation. Recognize these red flags before you start.
- Untreated cavities: Peroxide penetrates decay and reaches the pulp, causing severe pain. Fix cavities first.
- Active gum disease: Inflamed or infected gum tissue reacts badly to bleaching agents. Treat the infection before whitening.
- Exposed root surfaces: Roots lack enamel. Whitening gel on exposed dentin causes intense sensitivity and no shade change.
- Pregnancy: Most dental professionals advise avoiding elective whitening during pregnancy.
- Children under 16: Enamel is still developing; bleaching is not recommended.
- Extensive front-tooth restorations: Crowns, veneers, and bonding don’t respond to peroxide. Whitening the surrounding natural teeth creates a visible shade mismatch.
- Severe intrinsic stains: Tetracycline staining and fluorosis are internal discolorations that OTC peroxide can’t reach effectively. These cases need professional assessment.
When in-office whitening is genuinely superior: rapid, large shade changes (5+ shades), cases requiring custom gum protection, and any situation where a dentist needs to monitor the process. For a broader comparison of at-home vs. clinic treatments, the decision usually comes down to how much shade change you need and how quickly.
Pro Tip: Before your dentist appointment, write down which front teeth have restorations. Ask specifically: “Will whitening create a mismatch with my existing work?” A five-minute conversation prevents a costly color correction later.
Why peroxide works and why most “natural” hacks don’t
The chemistry is straightforward. Peroxide releases oxygen molecules that break apart the carbon bonds in stain molecules through controlled oxidation. The stain doesn’t get scrubbed away — it gets chemically dismantled. That’s why peroxide produces a shade change and charcoal doesn’t.
Abrasives only remove surface film. They can’t reach stain molecules embedded in enamel, and used aggressively, they remove enamel itself. A systematic review and meta-analysis of natural, peroxide-free bleaching agents found that peroxide-free agents alone did not produce a measurable bleaching effect. Natural agents added to peroxide showed some improvement, but the evidence does not support using natural agents as standalone dental bleaching.
“Consistency and correct concentration beat aggressive DIY. Daily gentle whitening for 1–2 weeks yields better outcomes with less sensitivity than a single high-intensity session.” — Dentist consensus summarized from clinical guidance
On LED light: two major meta-analyses found no added shade benefit from light activation at OTC peroxide concentrations. The light doesn’t accelerate oxidation at these levels — it just adds heat, which can raise sensitivity odds. The common teeth whitening misconceptions around LED kits are worth reading before you invest in one.
- Peroxide oxidizes stain molecules; abrasives only remove surface film
- Non-peroxide natural agents don’t produce measurable bleaching on their own
- LED light adds no meaningful shade benefit at OTC concentrations
- Potassium-nitrate toothpaste reduces post-whitening sensitivity through pre-loading dentinal tubules
Your pre-whitening checklist
Run through this before your first session. Print it, screenshot it, or bookmark it.
Before you start (2 weeks out):
- [ ] Schedule a dental check and cleaning
- [ ] Confirm no untreated cavities, gum disease, or exposed roots
- [ ] Note any crowns, veneers, or bonding on front teeth
- [ ] Switch to a potassium-nitrate desensitizing toothpaste and use it for 1–2 weeks before your whitening session
- [ ] Stop charcoal toothpaste and acidic mouthwashes
Day before your first session:
- Brush and floss thoroughly to remove all surface plaque
- Check gums — no swelling, redness, or bleeding
- Choose an OTC product within safe peroxide ranges (strips, pen, or tray kit)
- Do a small patch test: apply a tiny amount of gel to one tooth for 5 minutes and check for unusual sensitivity
- Plan your session duration and frequency (start shorter than the maximum recommended time)
- Prepare your touch-up schedule: note the date for your first maintenance session
Storage note: Store gel strips and whitening pens away from heat and direct sunlight. Check the expiration date — expired peroxide loses potency and may cause uneven results. Most gels are stable for 12–24 months unopened; once opened, use within the timeframe listed on the packaging.
Key Takeaways
Most adults can safely skip a dental clinic for routine whitening by following a structured prep protocol, choosing peroxide-based products within safe concentrations, and maintaining consistent daily habits.
| Point | Details |
|---|---|
| Prep before you whiten | Get a dental check, clean professionally, and use potassium-nitrate toothpaste for 1–2 weeks first. |
| Peroxide beats “natural” hacks | Only peroxide oxidizes stain molecules; non-peroxide agents don’t produce measurable bleaching. |
| Consistency over intensity | Daily gentle sessions for 1–2 weeks outperform a single aggressive application every time. |
| Know when to stop | Sharp persistent pain, gum swelling, or worsening sensitivity after a break means see a dentist. |
| Getsmilefam BLU Technology | Getsmilefam’s enamel-safe BLU Whitening Technology and Snow Serum™ Whitening Pen suit sensitive adults who want visible results without harsh chemicals. |
The case for skipping the clinic — with your eyes open
There’s a version of “skip the clinic” advice that’s just reckless. Grab some lemon juice, scrub with charcoal, and call it natural. That version causes real, irreversible damage.
The version worth following is different. It starts with a dental check — not because you’re handing the process back to a clinic, but because you need to know what you’re working with. Untreated decay and whitening gel is a painful combination. A clean bill of health means you can proceed confidently.
What most whitening content gets wrong is the obsession with speed. The readers who get the best at-home results are the ones who treat it like a two-week program, not a one-night fix. They use desensitizing toothpaste beforehand, apply a thin gel layer, and touch up every few months. That’s it. No aggressive concentrations, no LED theater, no acidic DIY pastes.
Getsmilefam’s approach fits this framework well. The BLU Whitening Technology and Snow Serum™ Whitening Pen are built for people who want visible results without the chemistry experiment. Enamel-safe formulas and no harsh peroxide mean the risk of sensitivity or damage is genuinely lower — which matters when you’re doing this at home without a dental professional watching.
The clinic isn’t always the answer. But neither is the trending hack. The middle path — evidence-backed, consistent, and conservative — is where the real results live.
Getsmilefam fits the skip-clinic approach
Skipping the clinic doesn’t mean skipping quality. Getsmilefam’s at-home lineup is built specifically for people who want visible whitening results without harsh chemicals, clinic costs, or long recovery windows.
The BLU Whitening Toothpaste is the daily maintenance anchor — enamel-safe, sensitivity-friendly, and designed for consistent use between whitening courses. For targeted touch-ups, the Snow Serum™ Whitening Pen delivers a precise, thin layer of serum to specific teeth without the setup of a full tray session. Travelers and anyone who wants a complete portable kit can check out the Premium Travel Kit, which covers whitening and maintenance in one compact set.
All three products use Getsmilefam’s proprietary BLU Whitening Technology, developed in Singapore, with formulas free from harsh chemicals and suitable for sensitive gums. If you’ve completed the prep steps in this guide and you’re ready to start, these are the products that fit the safe, consistent approach outlined here. And if any of the red flags in this article apply to you, consult a dentist before beginning any whitening program.
Useful sources and further reading
-
DIY Teeth Whitening: Too Good to Be True? — University of Rochester Medicine: Clinical warnings about DIY whitening mixes, acidic substances, and the risk of enamel erosion and pulp irritation.
-
Natural Teeth Whitening — MouthHealthy / ADA: ADA guidance on safe whitening products, the ADA Seal of Acceptance, and when to consult a dentist before bleaching.
-
Brighten Up: Quick Home Whitening Tips — AZDentist: Practical dentist-authored tips covering potassium-nitrate pre-treatment, professional cleaning as a prep step, gel application technique, and realistic timelines.
-
How to Whiten Teeth at Home: What Works (and What Doesn’t) — ArtSmiles: Meta-analysis summaries on peroxide vs. non-peroxide agents and LED light efficacy at OTC concentrations.
-
Efficacy of Natural, Peroxide-Free Tooth-Bleaching Agents — PubMed: Systematic review and meta-analysis of 15 databases concluding that peroxide-free natural agents do not produce measurable bleaching effects as standalone treatments.
-
How to Whiten Your Teeth, According to a Dentist — on305: Dentist consensus on the “low and slow” approach: daily gentle sessions over 1–2 weeks outperform aggressive single applications.
-
How to Whiten Teeth at Home and In Office — Aspen Dental: Overview of in-office and at-home options, maintenance habits, and side-effect management including sensitivity and gum irritation.
-
Getsmilefam — BLU Whitening Technology: Product context for the Snow Serum™ Whitening Pen, BLU Whitening Toothpaste, and BLU Whitening Technology; enamel-safe formulas without harsh chemicals, suitable for sensitive gums.
The consistent finding across clinical reviews: peroxide-based systems produce measurable shade changes; non-peroxide agents and LED light add little to no benefit at consumer concentrations. Prep, consistency, and correct concentration are what determine results.