

Whitening teeth without an expensive dentist is achievable through proven at-home methods that cost a fraction of professional treatment. OTC whitening strips with 10–14% peroxide deliver 2–5 shade improvements in about 20 days for $20–$50, while professional in-office whitening runs $300–$800 for a single session. Baking soda paste, hydrogen peroxide rinses, and OTC strips are the three most evidence-backed options for fixing discolored teeth without a dentist. The key distinction in dentistry is between extrinsic stains (surface level, caused by coffee, tea, and tobacco) and intrinsic stains (deep within the tooth). At-home methods work well on extrinsic stains. Intrinsic stains require professional care.
What safe, affordable substances whiten teeth at home?
The most effective at-home whitening agents fall into three categories: mild abrasives, peroxide-based gels, and OTC strip systems. Each works differently, and knowing which one fits your situation saves time and money.
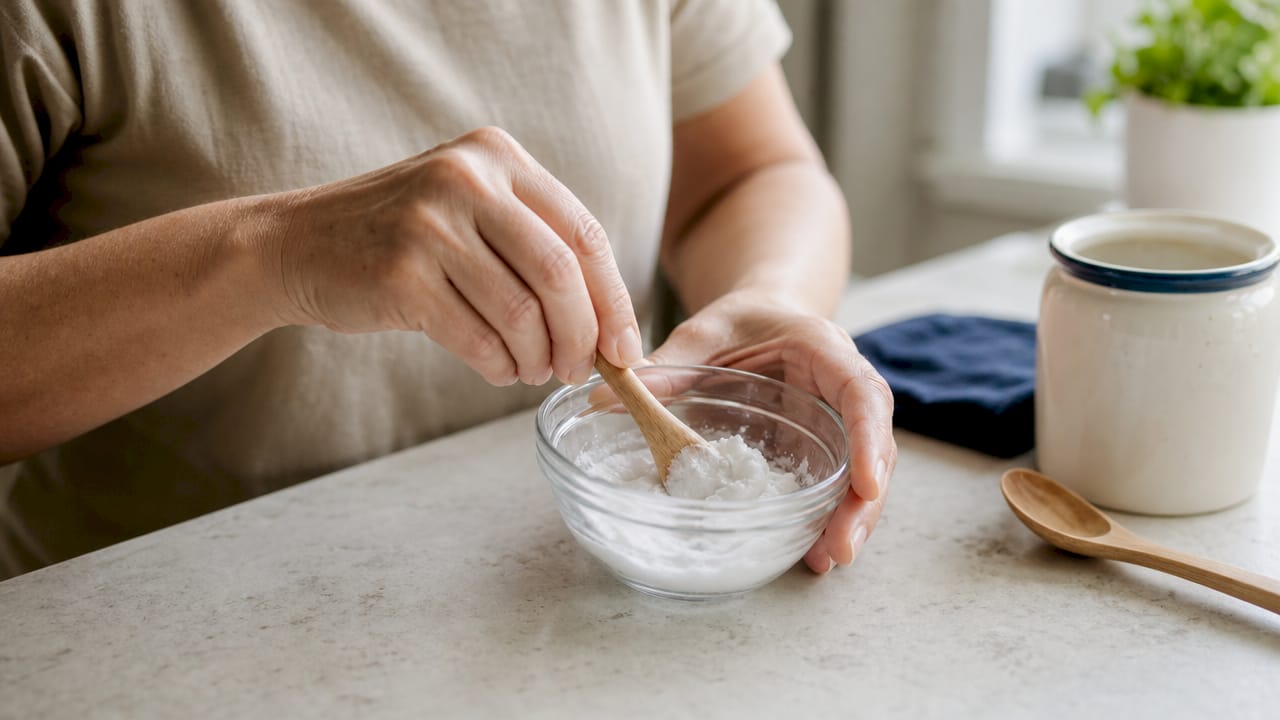
Baking soda paste is a mild abrasive that physically scrubs surface stains off enamel. Baking soda used 2–3 times per week removes surface stains effectively in 10–14 days with minimal enamel risk when applied correctly. It does not bleach teeth. It polishes them.
Hydrogen peroxide rinses and gels work through oxidation, breaking down the chemical bonds that cause staining. Safe at-home concentrations sit well below the 25–40% used in professional offices. OTC products typically use 3–10% solutions for rinsing or gel application. Low peroxide concentrations in OTC products are safer for people with sensitive teeth, making them a solid choice for gradual whitening.
OTC whitening strips combine a thin flexible backing with a peroxide gel layer. You press them against your teeth for 20–30 minutes per session. Whitening strips at 10–14% peroxide are effective home options that deliver 2–5 shade improvements in roughly 20 days. That result costs $20–$50 per treatment course.
Here is what to avoid entirely:
- Lemon juice or vinegar rinses. The acid erodes enamel permanently. Lemon juice and activated charcoal cause lasting enamel damage and sensitivity. No whitening benefit justifies that risk.
- Activated charcoal pastes. Marketed heavily online, but the abrasive particle size is too large and strips enamel over time.
- LED light kits. LED lights in whitening kits provide no proven whitening boost and may increase tooth sensitivity. Save the money and invest in a better gel instead.
Pro Tip: Check your existing dental work before starting any whitening program. Crowns, veneers, and bonding do not respond to peroxide. Whitening the natural teeth around them creates a visible color mismatch.
How to whiten teeth at home step by step
A consistent routine produces better results than any single product. Follow these steps for safe, effective at-home whitening.
- Clean your teeth first. Brush and floss before any whitening treatment. Plaque and food debris block the whitening agent from reaching enamel directly.
- Limit staining foods and drinks. Cut back on coffee, tea, red wine, and tobacco during your whitening period. Dietary changes reducing coffee and tea prevent new staining and support whitening efforts. Without this step, you are whitening and re-staining at the same time.
- Apply baking soda paste (2–3 times per week). Mix a small amount of baking soda with water to form a paste. Brush gently for 2 minutes. Rinse thoroughly. Do not use it daily. Daily use increases abrasion risk.
- Use a hydrogen peroxide rinse (once daily, max 60 seconds). Dilute 3% hydrogen peroxide with equal parts water. Swish for 60 seconds, then spit. Do not swallow. Limit to once per day and stop if sensitivity develops.
- Apply OTC whitening strips (as directed on the package). Most strips require 20–30 minutes per session, once daily for 14–20 days. Press them firmly against teeth to avoid uneven contact. Consistency matters more than duration.
- Track your progress with photos. Take photos in the same lighting every 5 days. Consistent lighting reveals real shade changes and keeps you motivated.
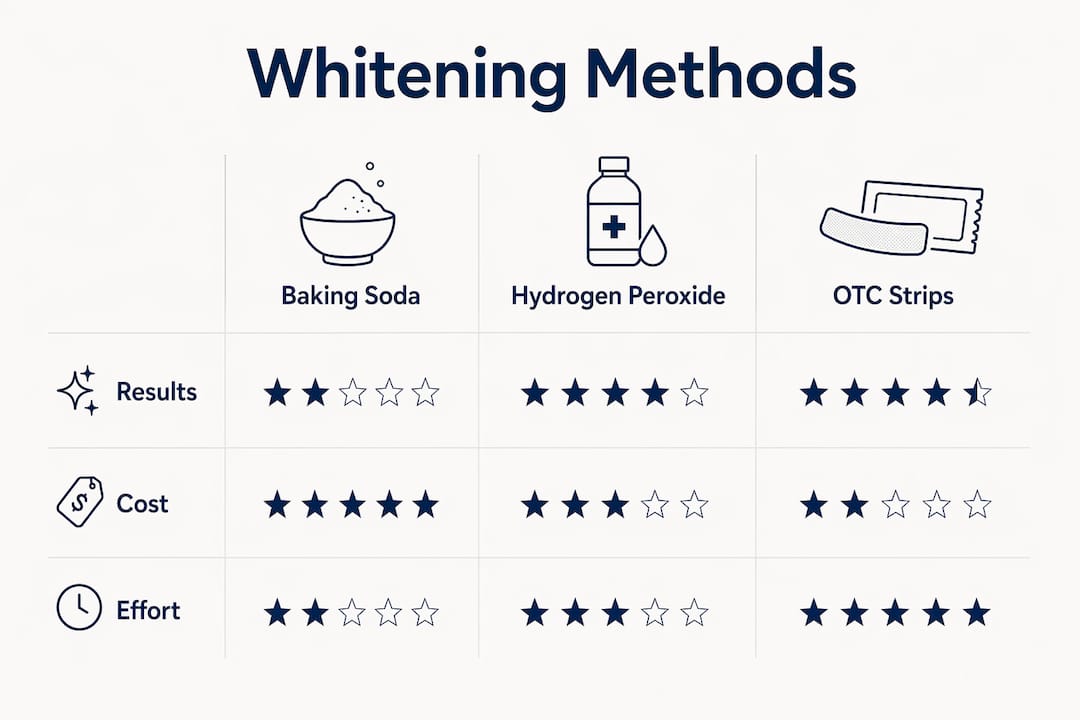
The table below compares the three main methods by effort, cost, and expected results.
| Method | Cost | Time to results | Shade improvement |
|---|---|---|---|
| Baking soda paste | Nearly free | 10–14 days | 1–3 shades |
| OTC whitening strips | $20–$50 | ~20 days | 2–5 shades |
| Professional in-office | $300–$800 | 60–90 minutes | 6–10 shades |
For a deeper look at at-home whitening benefits, Getsmilefam covers the full range of options and what each one realistically delivers.
Common mistakes that damage teeth during DIY whitening
Most whitening failures come from one of two errors: using the wrong product or using the right product too aggressively. Both are avoidable.
- Overusing abrasive pastes. Brushing with baking soda every day wears down enamel over time. Enamel does not grow back. Stick to 2–3 sessions per week.
- Ignoring dental restorations. Peroxide-based agents do not change the color of crowns, veneers, or bonded teeth. Whitening around them creates a permanent mismatch. Plan any cosmetic restorations after whitening your natural teeth.
- Pushing through sensitivity. Tooth sensitivity during whitening is a signal to stop, not push harder. Continuing treatment on already-irritated enamel causes lasting nerve sensitivity.
- Skipping a dental checkup. Whitening over untreated cavities or gum disease accelerates damage. A basic checkup before starting any whitening program protects you from making existing problems worse.
- Trusting viral DIY hacks. Activated charcoal, oil pulling, and turmeric pastes are popular online but lack clinical evidence for meaningful whitening. Some actively harm enamel.
“Whitening does not fix oral health problems. If you have cavities, gum disease, or cracked enamel, whitening agents will make those conditions worse. Address the underlying issue first, then whiten.”
For people with sensitive teeth, the safe whitening options guide from Getsmilefam outlines which methods minimize discomfort without sacrificing results. You can also explore oral care products designed to support enamel health alongside whitening routines.
What results can you realistically expect from at-home whitening?
At-home whitening produces real results. They just take longer than a professional session. Natural methods achieve 1–3 shade improvements over 10–14 days. OTC strips push that to 2–5 shades over about 20 days. Professional whitening uses 25–40% hydrogen peroxide to deliver 6–10 shades in a single 60–90 minute session at a cost of $300–$800. That is 7–15 times more expensive for faster, deeper results.
The type of stain determines how much improvement you will see. Natural methods and OTC products target extrinsic stains caused by coffee, tea, wine, and tobacco. Intrinsic stains, which form inside the tooth from aging, medications, or trauma, do not respond to surface whitening. If your discoloration started from the inside, at-home methods will not fix it.
| Stain type | Cause | At-home response |
|---|---|---|
| Extrinsic | Coffee, tea, tobacco, wine | Good response to OTC and natural methods |
| Intrinsic | Aging, medications, trauma | Requires professional treatment |
Maintaining results requires ongoing effort. Diet plays a direct role. Dietary changes alone take 6–8 weeks for existing stains to shed naturally. Cutting staining foods during and after treatment extends how long your results last. Whitening toothpaste works best as a maintenance tool after a primary whitening treatment, not as a standalone whitening method.
Pro Tip: After completing a strip or peroxide treatment course, switch to a whitening toothpaste for daily maintenance. It keeps surface stains from rebuilding and extends your results by weeks.
Key Takeaways
At-home whitening works best on extrinsic stains when you apply the right product consistently and avoid abrasive or acidic DIY shortcuts.
| Point | Details |
|---|---|
| OTC strips deliver real results | Strips with 10–14% peroxide improve 2–5 shades in about 20 days for $20–$50. |
| Baking soda is safe but limited | Use it 2–3 times per week for surface stains; daily use erodes enamel. |
| Avoid LED kits and acid hacks | LED lights add no proven benefit; lemon juice and charcoal cause permanent enamel damage. |
| Stain type determines outcome | Extrinsic stains respond to at-home methods; intrinsic stains require professional treatment. |
| Consistency drives results | Inconsistent application is the primary reason at-home whitening fails to meet expectations. |
The uncomfortable truth about at-home whitening compliance
I have spent years watching people buy the right products and still end up disappointed. The product is rarely the problem. Inconsistent application is the primary reason at-home whitening users fail to reach their expected results. People skip days, rush the process, or quit after a week because they do not see dramatic overnight change.
Here is what I have learned: at-home whitening is a slow, cumulative process. It rewards patience and punishes shortcuts. The people who get the best results are not the ones who buy the most expensive kit. They are the ones who follow the routine for the full 14–20 days without cutting corners.
The other thing most articles skip over is the restoration mismatch problem. If you have crowns or bonding on your front teeth, whitening the natural teeth around them will make the restorations look darker by comparison. That is not a product failure. It is a planning failure. Talk to your dentist about the sequence before you start.
My honest recommendation: start with OTC strips. They are evidence-backed, affordable, and produce measurable results when used correctly. Add a whitening toothpaste for maintenance. Skip the LED gadgets and the viral charcoal hacks. Gradual and consistent beats fast and aggressive every time.
— Lenney
Getsmilefam’s approach to safe, affordable whitening
Getsmilefam builds its whitening products around one principle: effective results without harsh chemicals. The BLU Teeth Whitening Kit uses proprietary BLU Whitening Technology developed in Singapore, with an enamel-safe formula free from high-concentration hydrogen peroxide. It is designed for people who want real results at home without the sensitivity risk that comes with aggressive professional-grade treatments.
For daily maintenance, the BLU Whitening Toothpaste keeps surface stains from rebuilding between whitening sessions. It uses lab-approved ingredients suitable for sensitive gums, making it a practical follow-up to any primary whitening treatment. Both products are priced to make consistent, safe whitening accessible without a dentist’s bill.
FAQ
How long does it take to whiten teeth at home?
Baking soda paste produces 1–3 shade improvements in 10–14 days. OTC whitening strips deliver 2–5 shades in about 20 days with consistent daily use.
Can you whiten teeth without bleach?
Yes. Baking soda paste removes surface stains through mild abrasion without any bleaching agent. Results are more gradual than peroxide-based methods but still visible within two weeks.
Do LED whitening kits actually work?
LED lights in at-home kits provide no proven additional whitening benefit and may increase tooth sensitivity. The quality of the whitening gel matters far more than the light device.
What causes teeth to look yellow despite brushing?
Surface stains from coffee, tea, wine, and tobacco build up on enamel over time and do not brush away with regular toothpaste. Intrinsic discoloration from aging or medications requires professional treatment and does not respond to at-home methods.
Is it safe to whiten teeth at home every day?
Daily use of abrasive methods like baking soda paste is not safe and risks enamel erosion. OTC strips should be used as directed, typically once daily for 14–20 days, then stopped to allow enamel to recover.