
Money-saving teeth whitening strategies are defined as cost-effective approaches to tooth bleaching that deliver measurable shade improvements without requiring expensive in-office procedures. You can achieve a noticeably brighter smile using over-the-counter products like Crest 3D Whitestrips, natural methods like baking soda paste, or dentist-supervised take-home trays at a fraction of clinic prices. Whitening strips cost $15 to $45 for a full treatment cycle, making them one of the most accessible entry points. Paying through an HSA or FSA account can cut professional whitening costs by an additional 20 to 30 percent, a detail most people never think to use.
1. Best over-the-counter whitening products for budget-conscious buyers
Over-the-counter whitening products are the most practical starting point for anyone learning how to whiten teeth on a budget. The category spans whitening strips, whitening toothpastes, and whitening pens, each with different cost profiles and timelines.
Whitening strips like Crest 3D Whitestrips Professional Effects deliver 2 to 5 shade improvements within 10 to 20 days. That result rivals many professional treatments at a cost between $15 and $45 per kit. For most people with surface staining from coffee or tea, this is the most efficient dollar-per-shade option available.
Whitening toothpastes formulated with nano-hydroxyapatite offer a gentler, daily-use approach. They work by remineralizing enamel while gently lifting surface stains, making them a smart complement to strip treatments rather than a standalone solution.
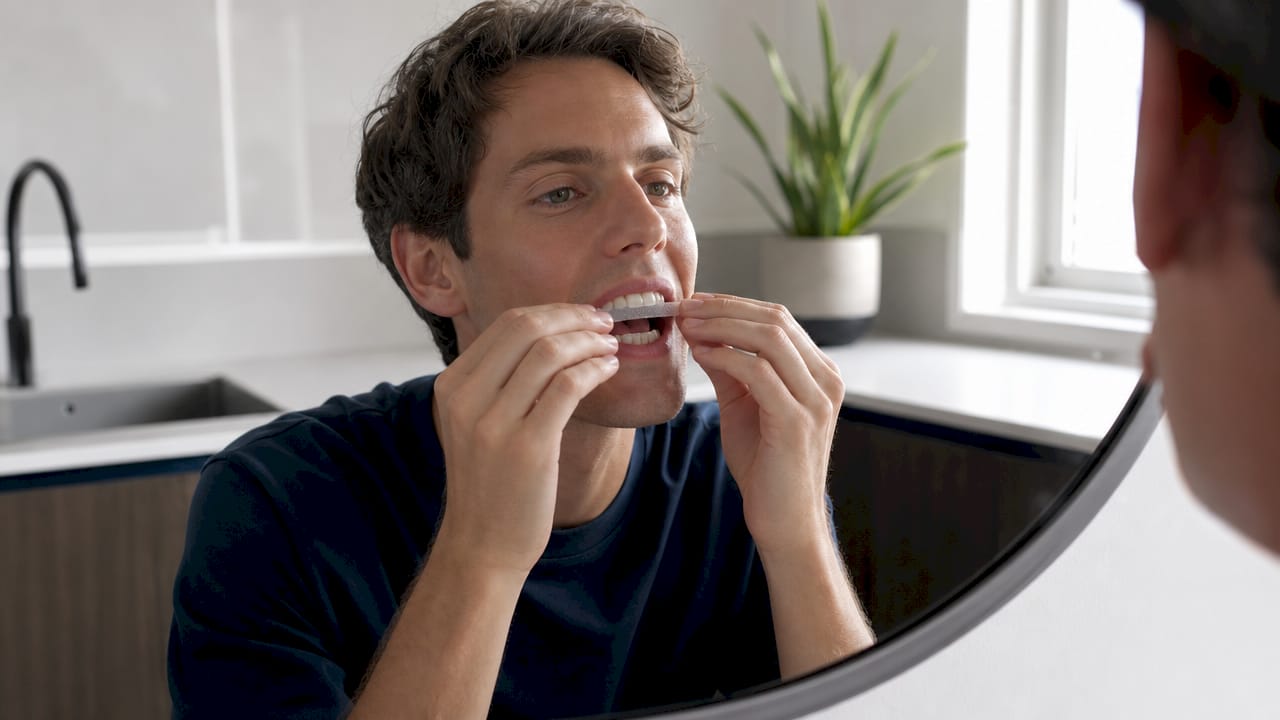
Whitening pens sit between strips and toothpaste in terms of intensity. They excel as touch-up tools after a strip cycle, not as primary treatments. Comparing whitening pens vs strips shows that pens win on convenience while strips win on total shade change.
- Crest 3D Whitestrips: $15 to $45, 2 to 5 shade improvement, 10 to 20 days
- Nano-hydroxyapatite toothpaste: $10 to $20, gradual surface stain removal, daily use
- Whitening pens: $10 to $25, best for maintenance and touch-ups
Pro Tip: Apply whitening strips at the same time each day and avoid eating or drinking for 30 minutes afterward. Consistent timing accelerates results and prevents uneven whitening.
2. How natural teeth whitening methods compare in cost and effectiveness
Natural teeth whitening hacks are the cheapest option available, but they come with real limitations that most budget guides understate. Understanding those limits upfront saves you time and protects your enamel.
Baking soda paste is the most research-supported natural method. Applied 2 to 3 times per week, it produces 1 to 3 shade improvements in 10 to 14 days. The mechanism is mild abrasion combined with a slightly alkaline environment that neutralizes acid-producing bacteria. It costs almost nothing and is safe for most people when used correctly.
Oil pulling with coconut oil is a slower method. Swishing a tablespoon for 10 to 20 minutes daily may reduce surface bacteria and improve gum health, with modest whitening visible after several weeks. The evidence base is thinner than for baking soda, but the risk profile is also near zero.
Natural methods work exclusively on extrinsic (surface) stains. Intrinsic stains caused by tetracycline antibiotics, fluorosis, or aging dentin require professional-grade bleaching agents. No natural method will touch them.
Two popular DIY approaches you should avoid completely:
- Activated charcoal: Marketed aggressively online, but charcoal damages enamel through abrasion. Eroded enamel exposes the yellow dentin underneath, making teeth look darker over time.
- Lemon juice: The citric acid etches enamel irreversibly. Short-term brightness comes at the cost of long-term yellowing and sensitivity.
For safe, natural whitening methods that protect your enamel, stick to baking soda and oil pulling. Skip anything abrasive or acidic.
3. What professional whitening options offer the best value
Professional whitening does not have to mean paying $600 to $1,000 for an in-office session. Several cost-effective whitening treatments bring clinical-grade results within a realistic budget.
Dentist-supervised take-home trays are the best value in professional whitening. They cost 30 to 40 percent less than in-office treatments while delivering nearly identical results. The price range is $100 to $400, with a typical outcome of 4 to 8 shade improvements over 1 to 3 weeks. Dentists consistently recommend this route for patients who want professional results without the premium price.
| Option | Cost Range | Shade Improvement | Timeline |
|---|---|---|---|
| In-office bleaching | $500 to $1,000 | 6 to 10 shades | 1 to 2 sessions |
| Dentist take-home trays | $100 to $400 | 4 to 8 shades | 1 to 3 weeks |
| OTC whitening strips | $15 to $45 | 2 to 5 shades | 10 to 20 days |
HSA and FSA accounts are an underused cost lever. Using pre-tax dollars through these accounts reduces whitening costs by 20 to 30 percent. You need an itemized receipt from your dentist, but the savings are real and immediate.
New patient promotions are another overlooked option. Many dental offices offer free whitening kits bundled with a new patient exam and cleaning. If you are due for a cleaning anyway, this can eliminate the upfront cost of a take-home tray kit entirely.
Pro Tip: Once you own custom-fitted trays, buy professional-strength gel refills at $30 to $80 rather than purchasing a new kit. The trays last years, so you only pay for the gel.
4. How to maintain whitening results affordably
Whitening results are not permanent, but the right maintenance habits extend them significantly without requiring repeat purchases every few months. This is where most people lose money: they whiten, then undo the results through diet and neglect.
Reducing coffee, tea, and red wine consumption extends whitening results by 6 to 8 weeks compared to unchanged dietary habits. That extension translates directly into fewer touch-up treatments and lower annual spending. You do not need to eliminate these drinks entirely. Drinking through a straw and rinsing with water immediately afterward reduces staining contact significantly.
Key maintenance habits that cost almost nothing:
- Brush twice daily with a whitening toothpaste containing nano-hydroxyapatite or mild silica
- Floss daily to prevent stain buildup at the gumline
- Rinse with water after consuming staining foods or beverages
- Schedule periodic touch-ups with a whitening pen or a single strip application every 4 to 6 weeks
Combining a one-time product purchase with consistent dietary maintenance produces sustainable results at the lowest possible annual cost. The math is straightforward: one $45 strip kit plus disciplined maintenance beats three $45 kits purchased reactively throughout the year.
5. Are LED whitening kits worth the money?
LED whitening kits are marketed as a premium at-home solution, but the evidence does not support paying extra for the light component. LED light alone has questionable efficacy unless paired with a clinical-grade gel. The whitening result comes from the gel concentration, not the light. This means a well-formulated whitening strip often delivers better value than an LED kit at two or three times the price.
The LED component accelerates gel activation in a clinical setting where gel concentration is high enough to benefit from it. At the lower peroxide or peroxide-free concentrations found in consumer LED kits, the light adds minimal measurable benefit. Marketing for these products frequently overstates the LED’s contribution to results.
If you are considering an LED kit, compare the gel concentration to a standard strip product at the same price point. If the strip offers comparable or higher active ingredient concentration, the strip is the better buy. Save the LED kit budget for a dentist take-home tray instead.
6. How to build a personalized budget-friendly whitening plan
A budget-friendly whitening plan starts with two questions: how much shade improvement do you need, and how quickly do you need it? Your answers determine which combination of methods makes financial sense.
- Low budget, moderate timeline: Start with Crest 3D Whitestrips or a comparable strip product. Run one full cycle of 10 to 20 days. Maintain with a whitening toothpaste and dietary adjustments. Total cost: under $50.
- Moderate budget, better results: Add dentist-supervised take-home trays after your OTC cycle. Use HSA or FSA funds to reduce the cost by 20 to 30 percent. Maintain with gel refills at $30 to $80 per refill rather than buying new kits.
- Urgent whitening need: Book an in-office session, but ask your dentist about new patient promotions or bundled packages first. Many offices discount in-office treatments when combined with a take-home maintenance kit.
Timing your purchases around seasonal promotions also matters. Dental offices frequently run whitening specials in January and before summer. Retailers discount strip kits around major shopping events. Buying during these windows can reduce your cost by 20 to 40 percent without changing the product.
Pro Tip: Consult your dentist before starting any whitening program if you have crowns, veneers, or significant sensitivity. Whitening agents do not affect restorations, and a dentist can help you set realistic expectations and avoid wasted spending on treatments that will not address your specific stain type.
For a structured approach, Getsmilefam’s budget whitening plan guide walks through each decision point with product-specific recommendations.
Key takeaways
The most cost-effective teeth whitening approach combines OTC strips for initial results, dietary maintenance to extend them, and professional take-home trays for deeper whitening when the budget allows.
| Point | Details |
|---|---|
| OTC strips deliver real results | Crest 3D Whitestrips produce 2 to 5 shade improvements for $15 to $45 per cycle. |
| Natural methods have real limits | Baking soda works on surface stains only; avoid charcoal and lemon juice entirely. |
| Take-home trays beat in-office cost | Dentist trays cost 30 to 40 percent less than in-office treatments with similar results. |
| HSA/FSA cuts professional costs | Pre-tax accounts reduce professional whitening costs by 20 to 30 percent. |
| Maintenance extends results | Reducing staining foods extends whitening longevity by 6 to 8 weeks per treatment. |
What I’ve learned after years of covering teeth whitening
The whitening category is full of products that charge a premium for technology that does not add proportional value. LED kits are the clearest example. I have reviewed dozens of them, and the pattern is consistent: the gel does the work, the light is the marketing. Spending $80 on an LED kit when a $35 strip kit contains comparable gel concentration is a waste of money.
The other mistake I see constantly is people skipping the maintenance phase. They spend $40 on strips, get great results, then drink coffee every morning without rinsing and wonder why their teeth are yellow again in six weeks. The whitening itself is the easy part. The discipline to protect the result is where most people fail, and it costs nothing.
My honest recommendation for most people: start with a quality OTC strip product, commit to the dietary adjustments for at least two months, and only escalate to professional trays if you need more than 3 to 4 shades of improvement. That path costs under $100 for the first year and delivers results that are genuinely noticeable. Consult your dentist before starting if you have any restorations or sensitivity. One conversation can save you from buying products that will not work for your specific situation.
The affordable whitening options that actually work are not complicated. They are just less exciting to market than a glowing LED mouthpiece.
— Lenney
Try Getsmilefam’s whitening solutions without the clinic price tag
Getsmilefam built its product line around one idea: you should not have to choose between effective whitening and a reasonable price. The Snow Serum™ Whitening Pen uses BLU Whitening Technology developed in Singapore, with an enamel-safe, hydrogen-peroxide-free formula that works for sensitive gums. It delivers visible results in a single session and fits into any maintenance routine without disrupting your budget. For travelers or anyone who wants a complete at-home kit, the Premium Travel Kit packages everything you need for consistent whitening on the go. Both products are designed to complement the cost-effective strategies covered in this article, not replace them.
FAQ
What is the cheapest effective teeth whitening method?
OTC whitening strips like Crest 3D Whitestrips are the cheapest clinically effective option, costing $15 to $45 for a full cycle that delivers 2 to 5 shade improvements in 10 to 20 days.
Does baking soda actually whiten teeth?
Baking soda applied 2 to 3 times per week produces 1 to 3 shade improvements in 10 to 14 days, but only for surface stains. It has no effect on intrinsic or deep staining.
Are dentist take-home trays worth the cost?
Yes. Dentist-supervised take-home trays cost $100 to $400 and deliver 4 to 8 shade improvements, which is 30 to 40 percent less expensive than in-office treatments with comparable results.
Can I use HSA or FSA funds for teeth whitening?
HSA and FSA accounts can reduce professional whitening costs by 20 to 30 percent when your dentist provides an itemized receipt. Check with your plan administrator to confirm eligibility before your appointment.
How long do whitening results last?
Whitening results typically last 3 to 6 months without maintenance. Reducing coffee, tea, and red wine consumption extends results by 6 to 8 weeks, and periodic touch-ups with a whitening pen or single strip application maintain brightness between full treatment cycles.