
Sensitive teeth and whitening treatments have a complicated relationship. The very thing you want, a brighter smile, can trigger sharp, shooting pain that stops you mid-treatment and puts you off trying again. But here is the truth: whitening methods for sensitive teeth have come a long way, and you no longer have to choose between comfort and results. The key is knowing which methods work with your enamel, not against it, and how to prepare your teeth before you even open a whitening product. This article walks you through exactly that.
Table of Contents
- Key criteria for choosing whitening methods for sensitive teeth
- Top whitening methods for sensitive teeth
- Comparing whitening methods for sensitive teeth: Effectiveness, cost, and safety
- Which whitening method is right for you?
- Why gentle, controlled whitening beats quick fixes for sensitive teeth
- Explore SmileFam’s gentle whitening products for sensitive teeth
- Frequently asked questions
Key Takeaways
| Point | Details |
|---|---|
| Start with desensitizing toothpaste | Using toothpaste with potassium nitrate before whitening builds tolerance and reduces sensitivity risk. |
| Choose low-concentration products | Lower peroxide levels whiten gradually with fewer side effects on sensitive teeth. |
| Use custom-fitted trays | Trays prevent gel from touching gums, minimizing chemical irritation during whitening. |
| Space whitening sessions | Allow 2-3 days between treatments to let enamel recover and prevent cumulative sensitivity. |
| Avoid abrasive natural methods | DIY options like charcoal can damage enamel and increase sensitivity, so use cautiously. |
Key criteria for choosing whitening methods for sensitive teeth
Not all whitening products are built the same, and for sensitive teeth, the differences matter more than most people realize.
Active ingredient concentration is the biggest variable. Higher peroxide concentrations deliver faster results but dramatically increase sensitivity risk. This is why two products can look identical on the shelf but feel completely different once you apply them. A 35% hydrogen peroxide treatment will whiten faster than a 6% formula, but it will also push whitening agents deeper into the enamel at a speed your nerves are not ready for.
Here is what to look for when evaluating any whitening product or treatment:
- Low peroxide concentration (under 10% hydrogen peroxide or equivalent carbamide peroxide for at-home use)
- Desensitizing agents like potassium nitrate, which blocks pain signals traveling through dentinal tubules, or fluoride, which remineralizes enamel and reduces nerve exposure
- Short contact time formulas that limit how long the whitening agent sits on the tooth surface
- Gum protection built into the delivery format, whether that is a custom tray, strip design, or pen applicator that keeps gel off soft tissue
The order of operations matters too. Dental professionals consistently recommend using a desensitizing toothpaste for two to four weeks before starting any whitening treatment. This is not optional prep, it is what separates a comfortable experience from a painful one.
A few habits that reduce sensitivity risk before you start:
- Switch to a potassium nitrate toothpaste at least two weeks before whitening
- Avoid acidic foods and drinks (citrus, coffee, vinegar-based dressings) in the 24 hours before each treatment
- Skip aggressive brushing right before you whiten. Brushing opens dentinal tubules temporarily
- Space your whitening sessions to give enamel time to remineralize between treatments
Understanding what makes safe whitening for sensitive smiles different from standard whitening is the foundation of everything. The at-home whitening benefits also extend beyond cost savings: you control the pace, which is exactly what sensitive teeth need.
Pro Tip: Apply a thin layer of desensitizing gel or toothpaste directly to your teeth 30 minutes before using any whitening product. Let it sit, spit it out, and then apply your whitening treatment. The difference in comfort is significant.
Having defined what makes a whitening method safe for sensitive teeth, let’s explore the top gentle whitening options you can choose from.
Top whitening methods for sensitive teeth
The best whitening for sensitive teeth is not always the most powerful. It is the one that gives you real results without leaving your teeth screaming for the next 48 hours. Here are the methods worth knowing.
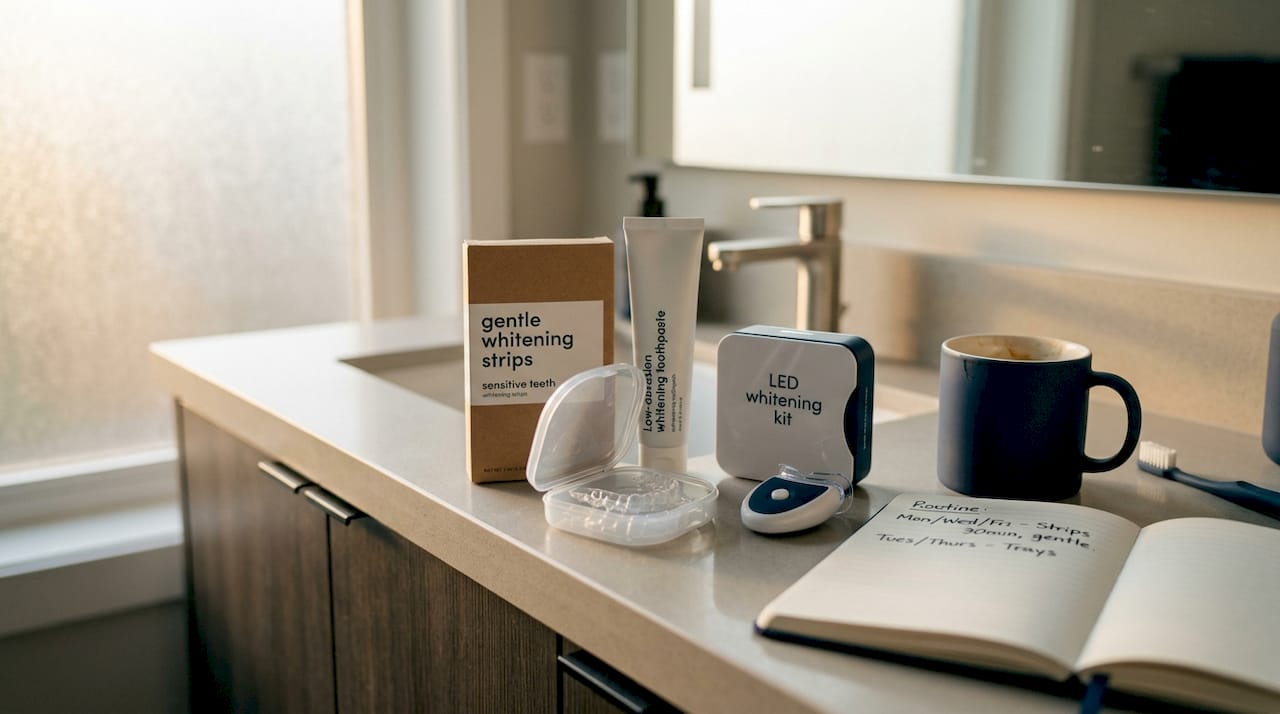
1. Desensitizing whitening toothpaste These toothpastes use mild abrasives and low concentrations of whitening agents alongside potassium nitrate or stannous fluoride. They work slowly, removing surface stains over weeks rather than days. They will not change the intrinsic color of your teeth, but they are a great foundation and maintenance tool. BLU Whitening Toothpaste is formulated specifically to strengthen enamel while gently addressing discoloration, making it a strong daily-use choice.
2. Whitening strips for sensitive teeth Strips designed for sensitive teeth use lower peroxide levels and shorter application windows. The key difference from standard strips is the adhesive delivery, which limits gel contact with gum tissue. These provide gradual, visible brightening over two to three weeks.
3. Custom-fitted whitening trays A dentist creates a tray molded precisely to your teeth, which means whitening gel stays exactly where it should and away from gum tissue. You fill the tray with a low to moderate peroxide gel at home. This is one of the most controlled methods available and works well for moderate sensitivity cases.
4. Professional in-office whitening Professional treatments typically use hydrogen peroxide concentrations between 25 and 35%, but with gum protection barriers and carefully monitored contact time to manage sensitivity. Results are fast, often three to eight shades in one session, but post-treatment sensitivity is common for 24 to 72 hours.
5. LED whitening kits with gentle gels LED light accelerates the whitening reaction, which means you can use lower concentration gels and still get visible results. The BLU Teeth Whitening Kit pairs LED technology with a sensitivity-conscious formula, giving you a controlled at-home experience without the aggressive chemistry of clinical-strength products.
6. Peroxide-free and natural options Activated charcoal, baking soda, and oil pulling are common home remedies for sensitive teeth. They work only on surface stains and work slowly. More on their limitations below, but they can serve a maintenance role when used correctly and sparingly.
Pro Tip: If you are using whitening strips or a pen, learn safe whitening pen use before your first application. Correct placement and contact time make a significant difference in both results and comfort.
Now that you know the key methods, here is a direct comparison to help you weigh your options clearly.
Comparing whitening methods for sensitive teeth: Effectiveness, cost, and safety
Over-the-counter whitening products are limited to a maximum of 10% active lightening ingredients, which is actually a sensible ceiling for sensitive teeth. Here is how the main methods stack up:
| Method | Whitening power | Sensitivity risk | Treatment time | Cost range |
|---|---|---|---|---|
| Whitening toothpaste | Low (surface stains only) | Very low | 4-8 weeks | $8 to $20 |
| OTC whitening strips | Mild to moderate | Low to moderate | 2-3 weeks | $20 to $50 |
| Peroxide-free LED kits | Mild to moderate | Very low | 2-4 weeks | $40 to $80 |
| Custom dentist trays | Moderate to high | Low (with prep) | 2-6 weeks | $200 to $600 |
| Professional in-office | High | Moderate to high | 1 to 3 sessions | $500 to $1,200 |
| Natural methods | Very low | Low to high (abrasion) | Months | $5 to $15 |
A few things this table does not capture but should:
- Sensitivity risk drops significantly with proper pre-treatment regardless of the method you choose
- Professional sensitive teeth whitening steps include gum barriers and custom post-treatment protocols that reduce but do not eliminate discomfort
- Natural methods carry a deceptive safety label. Baking soda and charcoal can be abrasive enough to thin enamel with overuse, which ultimately increases sensitivity long-term
- The cost-to-results ratio often favors mid-range options like LED kits with gentle gels, especially when you factor in multiple professional sessions
Pro Tip: Check top safe whitening picks if you want a curated list of products that balance all three columns: whitening power, low sensitivity risk, and affordability. The at-home whitening cost benefits become especially clear when you compare a quality at-home kit to even a single professional session.
With these differences in mind, let’s match the right method to your specific situation.
Which whitening method is right for you?
Choosing the right approach comes down to three things: how sensitive your teeth are right now, how much discoloration you are dealing with, and how quickly you want results.
Match your situation to a starting point:
- Mild sensitivity, light surface stains: Start with a desensitizing whitening toothpaste for four to six weeks. Add a gentle peroxide-free whitening pen for targeted areas. Manage expectations, this approach brightens gradually, not dramatically.
- Moderate sensitivity, noticeable yellowing: A low-peroxide LED kit used two to three times per week after a pre-treatment period is your best entry point. Space your sessions and monitor how your teeth respond.
- High sensitivity, significant discoloration: Custom trays from your dentist give you the most control. The fit prevents gel from touching gum tissue, and your dentist can prescribe the appropriate gel concentration.
- Severe sensitivity or dental work (crowns, veneers, bonding): Talk to your dentist first. Whitening agents do not work on dental restorations, and using aggressive products around them can create visible color mismatches.
A step-by-step approach for any sensitivity level:
- Use desensitizing toothpaste twice daily for two to four weeks before starting
- Choose a whitening product appropriate for your sensitivity level from the comparison above
- Do your first session on a day when you can monitor your response for a few hours
- Space sessions at least two to three days apart initially
- Stop immediately if you experience prolonged sensitivity lasting more than 24 hours
- Maintain results with whitening toothpaste rather than repeating full treatment cycles too quickly
Using whitening pens safely is a skill, not just a purchase. And building daily safe whitening routines around your sensitivity level keeps results consistent without the peaks and crashes of occasional aggressive treatments.
Whitening should be a controlled process, gradually lifting stains to allow tooth remineralization and minimize sensitivity. That framing changes everything about how you approach this.
Why gentle, controlled whitening beats quick fixes for sensitive teeth
Here is something the whitening industry rarely says out loud: most people damage their teeth not from choosing the wrong product, but from using the right product the wrong way.
Whitening is a process, not a one-time event. When you rush it, you force whitening agents into enamel before your nerves have any tolerance built up. The result is not just temporary pain. It is inflamed pulp tissue, heightened long-term sensitivity, and sometimes a reversal in enamel health that makes your teeth look more yellow over time, not less.
The pre-treatment step gets dismissed because it is boring. Pre-treating with desensitizing toothpaste for two to four weeks before starting is the single most effective way to prevent pain, yet most people skip it entirely because it adds time before visible results appear.
Here is the counterintuitive part: slower whitening often produces better results. Gradual treatment allows teeth to remineralize between sessions. That remineralization process actually makes enamel more receptive to whitening in subsequent sessions, meaning your teeth get brighter more efficiently over time than if you blasted them with a high-concentration treatment once and stopped because of the pain.
Natural methods deserve specific mention here because they carry a false “safe” reputation. Activated charcoal scrubs away surface stains through abrasion. Done occasionally, the impact is minimal. Done regularly, it physically wears down enamel, the protective layer that keeps your teeth from looking gray or translucent. Ironically, thinned enamel shows more of the yellow dentin underneath, making teeth look worse after months of “natural” whitening.
The patience required for gentle whitening is not a weakness in the approach. It is the mechanism. Your enamel needs recovery time. Your nerves need to recalibrate. Gentle whitening daily use tips are not just about product selection, they are about building a sustainable rhythm that actually delivers the long-term results aggressive quick fixes never do.
Explore SmileFam’s gentle whitening products for sensitive teeth
After learning exactly what separates safe whitening from painful whitening, the logical next step is choosing products that are already built around those principles.

SmileFam’s lineup is designed specifically for people who want visible results without the nerve-jangling side effects. The BLU Whitening Toothpaste uses enamel-strengthening ingredients including fluoride and potassium nitrate so your daily brushing routine actively supports sensitivity reduction. The BLU Teeth Whitening Kit combines LED technology with a controlled-concentration formula, giving you the acceleration of professional tools with the gentleness of a sensitivity-conscious formula. For a full routine, the Ultimate Whitening Bundle brings together toothpaste, strips, and the Snow Serum™ Whitening Pen for a gradual, comprehensive approach. These products are formulated without harsh chemicals and lab-approved for enamel safety, which is exactly what sensitive teeth need.
Frequently asked questions
Can I whiten my teeth if they are already sensitive?
Yes. Start with desensitizing toothpaste for one to two weeks before whitening and select a low-strength method to keep discomfort manageable. Most adults with sensitivity can whiten successfully with the right preparation and product choice.
What is the difference between hydrogen peroxide and carbamide peroxide for sensitive teeth?
Carbamide peroxide is less sensitizing because it releases whitening agents more slowly, making it better tolerated for gradual whitening in people with sensitivity compared to hydrogen peroxide.
How long should I wait between whitening sessions to protect sensitive teeth?
Space whitening treatments at least two to three days apart to allow enamel to remineralize and reduce cumulative sensitivity risk, especially during the first few weeks of a new whitening routine.
Are natural whitening methods safe for sensitive teeth?
Use them with caution. Natural DIY methods like activated charcoal and baking soda can be highly abrasive and may thin enamel over time, which increases sensitivity and should limit their use to occasional surface stain maintenance rather than regular whitening.