

Same-day teeth whitening is a targeted process that removes surface and subsurface stains from tooth enamel within a single session, using either professional-grade bleaching agents or over-the-counter whitening products. The same day teeth whitening steps you follow determine how bright your smile looks by the end of the day. Both professional in-office treatments and at-home methods like whitening strips, pens, and gel trays can deliver visible results quickly. The key difference is preparation, product strength, and what you do after the treatment ends.
What do you need before starting same-day teeth whitening?
Getting the right tools and checking your dental health before you start is not optional. It is the step most people skip, and it is exactly why they end up with sensitivity, uneven results, or irritated gums.
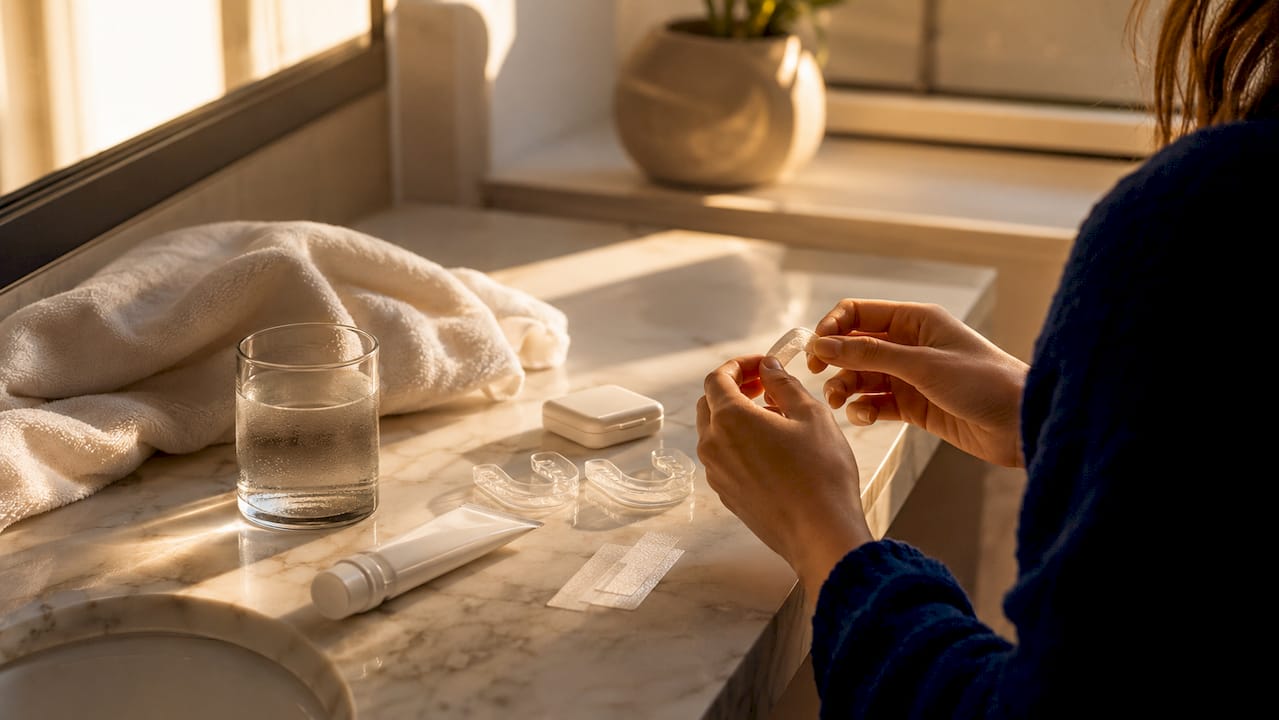
Products and tools for at-home whitening
The main at-home whitening formats are strips, gel trays, whitening pens, and peroxide-based pastes. Whitening strips typically use 7–10% hydrogen peroxide gel and work primarily on the front teeth. That concentration is strong enough to lift surface stains but gentle enough for most people to use without professional supervision. Gel trays cover more tooth surface and allow longer contact time with the whitening agent. Whitening pens, like the Snow Serum™ Whitening Pen from Getsmilefam, apply a thin layer of serum directly to each tooth for targeted treatment.
Dental health check: do this first
Avoid whitening if you have active gum disease or untreated cavities. Potent bleaching agents penetrate compromised tissue and cause severe pain. That is not a minor inconvenience. It can set back your dental health significantly. Check with your dentist if you are unsure about the condition of your gums or enamel before applying any whitening product.
Managing sensitivity before you begin
Use a potassium nitrate toothpaste for two weeks before your whitening session to reduce sensitivity. Potassium nitrate blocks the nerve pathways in your teeth that react to peroxide. This preparation step makes the actual whitening process far more comfortable. Brands like Sensodyne Pronamel are widely available and effective for this purpose.
| Feature | At-home whitening | Professional in-office |
|---|---|---|
| Peroxide concentration | 7–10% | 35–40% |
| Session time | 30–60 minutes | About 90 minutes |
| Cost | Low to moderate | Approximately $500 |
| Results speed | Days to one week | Same day |
| Sensitivity risk | Low to moderate | Higher, often temporary |
Pro Tip: Buy your sensitivity toothpaste at least two weeks before your planned whitening date. Starting it the night before does nothing.
How to apply at-home whitening products step by step
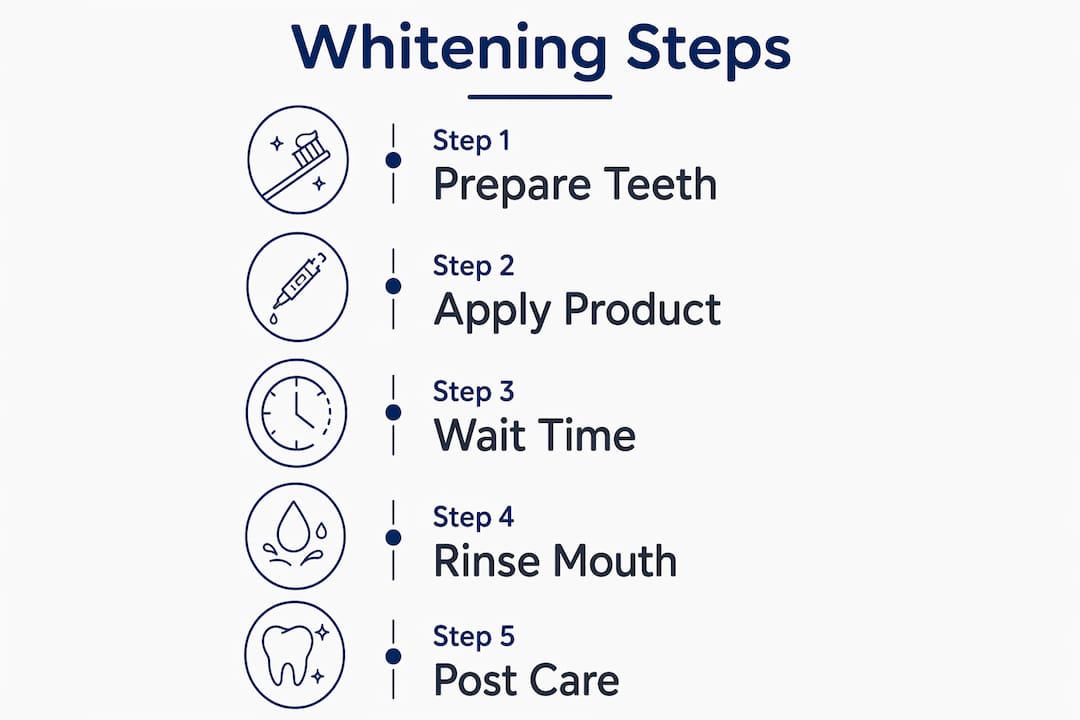
The cosmetic teeth whitening step by step process at home is straightforward, but small mistakes add up fast. Follow this sequence carefully to get the best result without damaging your gums or enamel.
- Brush and floss your teeth thoroughly. Clean teeth allow the whitening agent to contact the enamel directly. Residue from food or plaque blocks the gel and reduces effectiveness.
- Dry your teeth lightly. Use a clean tissue or gauze to remove excess saliva from your teeth. Saliva dilutes the peroxide gel and weakens the whitening effect.
- Apply the whitening product evenly. For strips, press them firmly against the front teeth and smooth out any air pockets. For gel trays, apply the gel correctly in a thin, even layer inside the tray before placing it over your teeth. For a whitening pen, paint each tooth with one slow stroke.
- Set a timer and wait. Tray wear time is typically 30 minutes. Do not exceed the recommended time. Overuse causes gum irritation and tooth sensitivity without producing better results.
- Remove and rinse thoroughly. Take off the strips or tray and rinse your mouth with water for 30 seconds. Do not brush immediately after. Your enamel is temporarily more porous and vulnerable right after treatment.
- Avoid eating or drinking for at least 30 minutes. This gives the whitening agent time to fully absorb and the enamel time to begin remineralizing.
Overuse of whitening trays causes sensitivity and gum irritation. One session per day is the maximum for most over-the-counter products. Repeating applications back to back does not accelerate results. It only increases the risk of damage.
Pro Tip: Whiten in the evening rather than the morning. You are less likely to eat or drink staining foods right after, and your teeth have the whole night to recover before your next meal.
What does the professional same-day whitening procedure look like?
Professional in-office whitening is the fastest path to a visibly brighter smile. The standardized 6-step dental bleaching process includes consultation, cleaning, gum protection, gel application, light activation, and rinsing. Each step serves a specific purpose, and skipping any of them reduces both safety and results.
Here is how the full procedure runs:
- Consultation. The dentist checks your tooth shade, reviews your dental history, and confirms you are a good candidate for bleaching.
- Professional cleaning. Any plaque or tartar is removed so the bleaching gel contacts clean enamel.
- Gum protection. A rubber dam or protective gel is applied to your gums to shield them from the high-concentration peroxide.
- Gel application. The dentist applies a 35–40% hydrogen peroxide gel directly to the tooth surfaces. This concentration is far stronger than anything available over the counter.
- Light or laser activation. A special light source is directed at your teeth to accelerate the chemical reaction and break down stains faster.
- Rinsing and evaluation. The gel is removed, your mouth is rinsed, and the dentist compares your new shade against the baseline.
In-office whitening takes about 90 minutes and costs approximately $500. Many people experience temporary extreme sensitivity after the session. That sensitivity typically fades within 24–48 hours. At-home methods cost far less and carry lower sensitivity risk, but they cannot match the speed or degree of shade change that professional treatment delivers in a single visit.
| Factor | At-home method | Professional in-office |
|---|---|---|
| Shade change speed | Days | Same day |
| Supervision | None | Dentist supervised |
| Sensitivity after | Mild | Often significant |
| Longevity of results | Weeks to months | Months with maintenance |
How to protect your results after whitening
Post-whitening care is where most people lose the gains they just made. The 48 hours after treatment are the most critical window for protecting your results.
Whitened teeth are more porous for 48 hours after treatment and absorb staining agents much more easily than normal. That means coffee, tea, red wine, dark berries, tomato sauces, and tobacco can undo your results almost immediately. The pores in the enamel are temporarily open, and pigment molecules slip straight in.
Here is what to do and avoid in the first 48 hours:
- Drink water instead of coffee, tea, or juice
- Eat white or light-colored foods: chicken, rice, yogurt, bananas, and white fish
- Avoid tobacco in any form
- Skip red wine, dark sodas, and berry-based smoothies
- Use a straw if you must drink anything with color
Beyond the 48-hour window, consistent oral hygiene extends your whitening results significantly. Regular brushing, flossing, and limiting pigment-rich foods keep your enamel cleaner and your smile brighter for longer. Getsmilefam’s lifestyle guide for whiter teeth covers the daily habits that make the biggest difference over time.
Professional whitening results are not permanent and depend entirely on your lifestyle habits and daily care. That is not a flaw in the treatment. It is just how enamel works. Plan for a touch-up session every three to six months if you drink coffee or wine regularly.
Pro Tip: Keep a whitening pen in your bag for quick touch-ups after meals. One stroke per tooth takes 30 seconds and prevents stains from setting in.
Key takeaways
Same-day teeth whitening delivers real results only when preparation, correct application, and post-care all happen in sequence.
| Point | Details |
|---|---|
| Check dental health first | Do not whiten over active gum disease or untreated cavities to avoid pain and damage. |
| Prepare with sensitivity toothpaste | Use potassium nitrate toothpaste for two weeks before whitening to reduce discomfort. |
| Follow tray timing strictly | Limit tray wear to 30 minutes and avoid back-to-back applications to prevent irritation. |
| Protect results for 48 hours | Avoid coffee, tea, red wine, and tobacco immediately after whitening while enamel is porous. |
| Plan for maintenance | Results fade without consistent oral hygiene and periodic touch-up treatments. |
What I have learned from watching people whiten their teeth wrong
Most people treat whitening like a one-time fix. They do the session, see the result, and go straight back to their regular coffee habit the next morning. Within a week, they are back to their original shade and convinced that whitening “does not work.” The treatment worked fine. The aftercare did not.
The other mistake I see constantly is skipping the dental health check. Someone with a small untreated cavity applies a high-peroxide strip and spends the next two days in pain. That experience puts them off whitening entirely, which is a shame, because the fix was simple: see a dentist first.
At-home whitening is genuinely effective for front teeth staining caused by food and drink. It is not the right tool for deep intrinsic staining caused by tetracycline antibiotics or fluorosis. Those cases need professional treatment or veneers. Knowing which category your staining falls into saves you time and money.
The sensitivity management guide from Getsmilefam is one of the more practical resources I have come across for people who have tried whitening before and given up because of discomfort. Sensitivity is manageable. It should not be a dealbreaker.
Whitening is a regimen, not an event. The people with consistently bright smiles are not doing one big session a year. They are doing small, consistent maintenance steps every week.
— Lenney
Get quick whitening results with Getsmilefam
Getsmilefam builds its whitening products around BLU Whitening Technology, developed in Singapore, with enamel-safe formulas that skip harsh peroxide. The Snow Serum™ Whitening Pen delivers targeted application in seconds, making it practical for daily touch-ups or travel. For a complete at-home whitening setup, the Premium Travel Kit includes everything you need to whiten and maintain your results wherever you are.
If you are new to whitening or switching from a product that caused sensitivity, Getsmilefam’s formulas are designed for sensitive gums without sacrificing speed. Browse the full range at getsmilefam.com and find the right fit for your routine.
FAQ
How long does same-day teeth whitening take at home?
At-home whitening with strips or gel trays takes 30–60 minutes per session. Results from a single session are subtle but visible, especially on surface stains.
Is it safe to whiten teeth more than once in a day?
No. Repeating whitening applications back to back increases gum irritation and tooth sensitivity without improving results. One session per day is the safe maximum for over-the-counter products.
What concentration of peroxide do at-home strips use?
At-home whitening strips typically use 7–10% hydrogen peroxide. Professional in-office treatments use 35–40%, which is why professional results are faster and more dramatic.
Can I eat normally right after whitening?
No. Avoid staining foods and drinks for at least 48 hours after whitening. Whitened enamel is more porous during this window and absorbs pigment much more easily than usual.
Does professional whitening hurt?
Many people experience temporary extreme sensitivity after in-office whitening. It typically fades within 24–48 hours and can be managed with sensitivity toothpaste used before and after treatment.