
Getting a noticeably brighter smile at home doesn’t require expensive dental visits or complicated kits. A teeth whitening pen application guide does exactly what the name promises: it walks you through the correct technique, timing, and safety steps to get the most from your pen without risking sensitivity or wasted product. These pens, often referred to in dentistry as topical bleaching applicators, work by delivering a thin coat of whitening gel directly onto your tooth surface. Follow the right steps, and you’ll see results. Skip them, and you’ll likely be disappointed or dealing with unnecessary discomfort.
Table of Contents
- Key takeaways
- Teeth whitening pen application guide: getting ready
- Step-by-step application for the best outcome
- Common mistakes that sabotage your results
- Understanding results and aftercare that lasts
- My honest take on whitening pen expectations
- Get brighter results with Getsmilefam’s whitening tools
- FAQ
Key takeaways
| Point | Details |
|---|---|
| Prep your teeth first | Brushing, flossing, and fully drying your teeth before applying makes a measurable difference in how well the gel adheres. |
| Apply thin and even | A single thin layer on the front surface of each tooth is more effective than a thick glob that smears onto your gums. |
| Timing matters | Leaving the gel on for the recommended 10 to 30 minutes maximizes results without overloading your enamel. |
| Pens work best as maintenance | Whitening pens support touch-ups and maintenance better than they replace full bleaching treatments. |
| Sensitivity is a signal | Persistent discomfort after use means you should pause and reassess your frequency before continuing. |
Teeth whitening pen application guide: getting ready
Before you uncap the pen, what you do in the five minutes leading up to application directly affects your outcome. This is the step most people skip, and it’s also the step most responsible for patchy or weak results.
What you’ll need before you start:
- A soft-bristle toothbrush and fluoride toothpaste
- Dental floss or an interdental brush
- A clean tissue or dry cloth
- Your whitening pen (stored at room temperature)
- A mirror with good lighting
Brushing and flossing beforehand clears away plaque and food particles that would otherwise sit between the gel and your enamel. Think of it this way: applying whitening gel over plaque is like painting over dirt. The gel can’t do its job if there’s a barrier in the way.
Drying your teeth is equally non-negotiable. Saliva dilutes the active ingredients and prevents the gel from sticking to the enamel surface. Use a tissue to gently pat each tooth dry, and consider holding your lips slightly open for 30 seconds before you begin to reduce moisture reaccumulation.
How a whitening pen works at the chemistry level
The active ingredients in most whitening pens are either hydrogen peroxide or carbamide peroxide. Hydrogen peroxide whitens and kills bacteria, while carbamide peroxide breaks down more slowly and tends to be better tolerated by people with sensitivity concerns. Getsmilefam’s Snow Serum™ Whitening Pen takes a different approach, using an enamel-safe formula developed with BLU Whitening Technology that avoids harsh peroxide agents entirely, which matters a lot if you have reactive gums.
Pro Tip: Store your pen horizontally rather than tip-down when not in use. This keeps the gel evenly distributed inside the barrel and prevents the applicator brush from drying out between sessions.
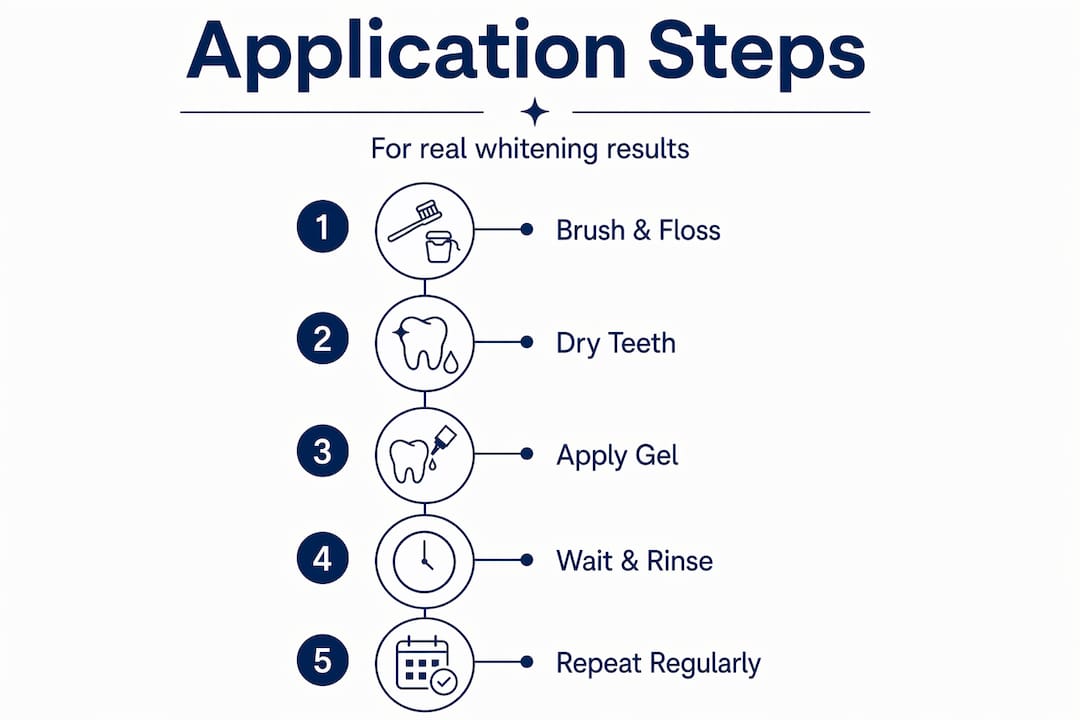
Step-by-step application for the best outcome
Now you’re prepped and ready. Here’s exactly how to apply your whitening pen for maximum effectiveness:
-
Twist the base slowly. Most whitening pens dispense gel by rotating the bottom of the pen clockwise. Turn it gently, one click at a time, until you see a small amount of gel appear on the brush tip. You need just enough to coat two to three teeth at once. Less is more here.
-
Start at the center of your smile. Begin with your two front teeth and work outward. This ensures your most visible teeth get the most consistent coverage. Hold the pen like a marker and use the tip, not the side, of the brush.
-
Apply a thin, even coat on each tooth’s front surface. Careful application with the brush tip gives you the precision to hit each tooth without smearing onto soft tissue. One smooth stroke down each tooth is all you need.
-
Keep lips and cheeks pulled back. Smiling slightly or using a lip retractor (the kind sold at most pharmacies) keeps the gel from transferring to your gums or the inside of your lips. Gel contact with soft tissue causes irritation, not whitening.
-
Avoid swallowing. The gel is designed for external tooth application only. If you taste it strongly, you’ve applied too much.
-
Let the gel set for 10 to 30 minutes. Gel contact time of at least 10 minutes is the minimum needed for active ingredients to penetrate surface stains. Some formulas work in 15 minutes; others recommend up to 30. Check your pen’s instructions.
-
Avoid eating, drinking, or rinsing immediately after. Give the gel a full working window. Rinsing too soon cuts the whitening session short. Water is fine after 30 minutes; coffee, tea, and red wine should wait at least an hour.
-
Repeat based on your pen’s specific instructions. Most formulas suggest once daily or every other day during an initial whitening phase, then scaling back to a few times per week for maintenance.
Pro Tip: Apply your whitening pen right before bed. Overnight, you’re not eating or drinking, which means the gel has more uninterrupted time to work, and you naturally avoid the post-application window where food and drink can stain.
You can also check this stain removal technique guide from Getsmilefam for more on how to target specific stained areas with a pen safely.
Common mistakes that sabotage your results
The most frustrating part of using a whitening pen is doing most things right and still not seeing the outcome you expected. Usually, one of the following mistakes is to blame.
Mistakes that reduce effectiveness or cause harm:
- Skipping the drying step. Wet enamel reduces gel adhesion dramatically. A 30-second dry-off changes everything.
- Applying too much gel. A thick coat doesn’t whiten faster. It increases the chance of gum contact, irritation, and uneven coverage.
- Touching the gums directly. Gel on gum tissue causes chemical irritation that feels like a burn. If it happens, rinse immediately with cool water.
- Using the pen too frequently. Overuse can trigger sensitivity and gum irritation, and in extreme cases, cause enamel damage. Follow the schedule on your product’s label.
- Expecting overnight transformation. Clinical studies confirm peroxide works best with consistent application over time, not in a single session. Realistic expectations prevent frustration.
- Relying on LED light add-ons. Research shows light activation offers limited clinical advantage with OTC pens and may raise sensitivity risk. Skip the gadgets and focus on proper gel contact time instead.
If you experience sharp sensitivity that lingers for more than 24 hours after using a whitening pen, pause your sessions. This is your enamel signaling that it needs a break. Switching to a sensitivity-friendly whitening method and spacing out sessions by a day or two usually resolves it.
Managing sensitivity proactively is smarter than treating it reactively. If you know you’re prone to sensitivity, start with every other day from the beginning and use a toothpaste formulated for sensitive teeth on the days in between.
Understanding results and aftercare that lasts
Here’s what a realistic whitening pen results guide looks like, broken down honestly:
| Timeframe | What to expect |
|---|---|
| After first use | Slight brightening visible, especially on surface stains from coffee or tea |
| After 7 to 10 days | Noticeably whiter shade across most of the smile, deeper stains still fading |
| After 30 days | Maximum results from at-home pen use; maintenance phase begins |
| Ongoing (monthly) | Touch-ups keep results stable without restarting from scratch |

The key to lasting brightness is what happens after the whitening phase, not during it. Rinse with water after meals when you can. Cut back on the foods most responsible for staining: coffee, tea, red wine, and dark berries. And if you use mouthwash, avoid alcohol-based formulas right after a whitening session since they can dry out enamel and increase sensitivity temporarily.
For users with sensitive teeth, carbamide peroxide formulas are generally gentler than hydrogen peroxide alternatives. Getsmilefam’s Snow Serum™ avoids both, which makes it a genuinely useful option for people who’ve had bad experiences with other whitening products. You can also explore whitening options for sensitive teeth to find the right approach for your situation.
Pro Tip: After your initial whitening phase, use your pen just two to three times per week rather than daily. This maintenance routine preserves your results without putting repeated stress on your enamel.
If you’ve been consistent and still feel your results have plateaued, that’s a signal worth discussing with your dentist. Some intrinsic stains, the ones that live inside the tooth structure rather than on the surface, don’t respond to topical gels at any strength. A professional conversation helps you know the difference.
My honest take on whitening pen expectations
I’ve followed the research on whitening pens closely, and the single biggest disconnect I see is between how these products are marketed and what they actually do well.
Whitening pens are not replacements for a full bleaching treatment. They never were. What they genuinely excel at is maintenance. After a professional treatment or a full kit session, a pen helps you hold onto your results between sessions without the time and cost of repeating the whole process. That’s the honest use case, and it’s a genuinely useful one.
I’ve also seen people chase faster results by applying gel twice a day or leaving it on longer than recommended. It doesn’t work that way. More gel contact doesn’t mean faster or better whitening. It means more risk of sensitivity, and sometimes visible enamel irritation that takes weeks to settle down. The maintenance role of whitening pens is well established; the “more is more” approach simply isn’t.
The other thing I’d push back on is the LED light trend. The evidence that light activation adds meaningful benefit to OTC pen use is thin, and the potential to increase pulp temperature without supervision is a real concern. A well-formulated gel used correctly and consistently will outperform any gimmick attachment.
Use the pen as it’s designed. Be patient. Protect the results with better aftercare habits. That combination does more for your smile than any shortcut.
— Lenney
Get brighter results with Getsmilefam’s whitening tools

If you’re ready to put this guide into practice, Getsmilefam makes the process easier with products built specifically for safe, at-home use. The Snow Serum™ Whitening Pen uses BLU Whitening Technology developed in Singapore and skips the harsh peroxide agents that trigger sensitivity in so many people. It’s designed to apply smoothly, set quickly, and fit into a real daily routine without a learning curve.
For people who want to pair their pen with a daily maintenance step, the BLU Whitening Toothpaste works alongside the pen to keep surface stains from building back up between sessions. If you’re starting from scratch and want a full at-home system, the BLU Teeth Whitening Kit gives you everything you need to complete an initial whitening phase before switching to pen-only maintenance.
FAQ
How do I use a teeth whitening pen correctly?
Brush and floss first, then dry your teeth thoroughly before applying. Twist the pen base to release a small amount of gel, apply a thin coat to the front surface of each tooth, avoid gum contact, and leave it on for 10 to 30 minutes before eating or drinking.
How long does it take to see results from a whitening pen?
Most people notice surface stain lightening after the first few uses, with more visible results appearing after seven to ten days of consistent application. Deeper stains may take up to 30 days to respond fully.
Can whitening pens damage enamel or gums?
Overuse and direct gel contact with soft tissue are the most common causes of irritation. Following the product’s recommended frequency and applying only to the tooth surface keeps the risk minimal.
Are whitening pens safe for sensitive teeth?
Yes, especially formulas using carbamide peroxide or peroxide-free alternatives. Spacing sessions to every other day and using a sensitivity toothpaste between sessions also reduces discomfort significantly.
Do whitening pens replace professional teeth whitening?
No. Whitening pens work best as a maintenance tool to preserve professional or kit-based whitening results, rather than as a primary bleaching treatment on their own.